
This tutorial has been written in occasion of my OH installation on a brand new RPi2 model B. It is meant to be a step by step guide to help myself (and others) in case of new installations.
Purchasing the hardware
I had a RPi1 model B already running in my apartment with OpenHAB and other backup services. It was running not very fine, mainly suffering from the slow CPU trying to run the JVM. On that machine OpenHAB was often slow giving a bad user experience.
OpenHAB community have a hardware FAQ page here suggesting BananaPi over RPi due to its SATA connection much more efficient than the microSD. Personally I decided for the RPi because of its vast community and because I did not like the idea to have an additional SATA HDD outside the tiny box.
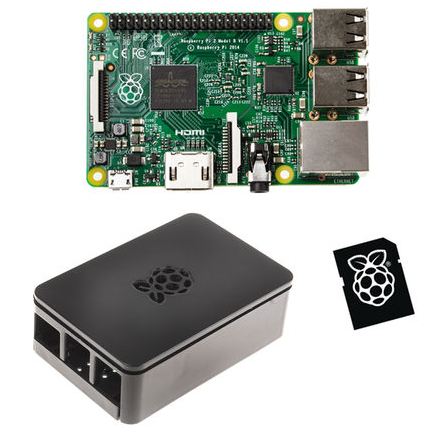
I decided to get a RPi2b + NOOBS + black case available for €46,50 from RS
Configuring the RPi (headless)
Connecting
Just plug the Ethernet connector to your network and power up the unit providing 5Vdc via the micro USB connector. The unit is shipped with dynamic IP address and if you have a DHCP server in your LAN it will get a proper IP. Open your router webpage and look for the assigned IP address, otherwise use Fing application for Android to get the address; you should look for Raspberry Pi Foundation device.
In my case I got 192.168.1.204
By using ssh (on Linux) or Putty (on Windows) you can connect to that IP.
The default root user is ‘pi’ and the default password is ‘raspberry’
You may eventually change the password with sudo raspi-config command
Setting a static IP Address
I followed a really nice guide available here
And basically I edited the network configuration file with command sudo nano /etc/network/interfaces
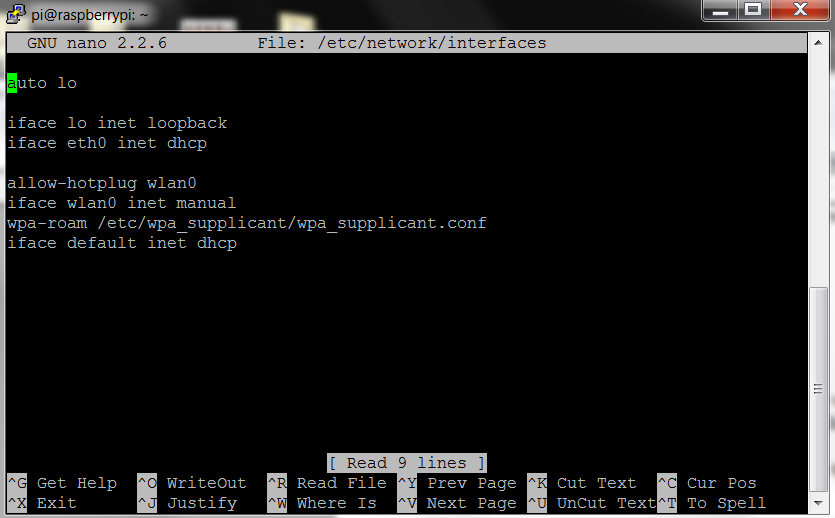
Simply change the line that reads:
iface eth0 inet *dhcp*
to
iface eth0 inet *static*
Then directly below this line enter the following (Please Note. You will need your own addresses we gathered in Part B, more details below). . . .
address 192.168.1.3
netmask 255.255.255.0
network 192.168.1.0
broadcast 192.168.1.255
gateway 192.168.1.1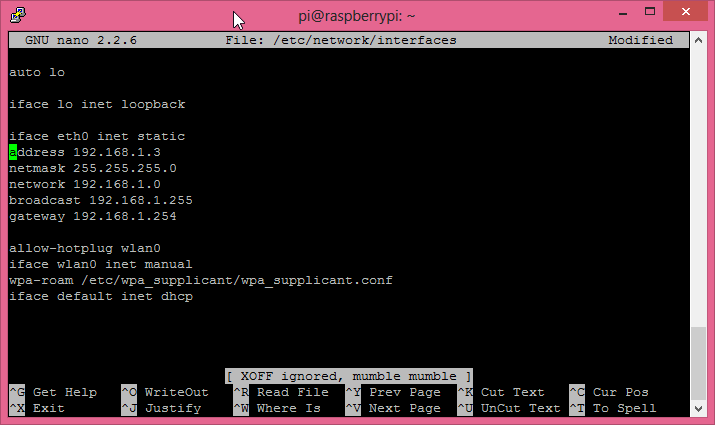
sudo rm /var/lib/dhcp/*
Then we’ll need to reboot and check your changes. . .
sudo reboot
Log back in and run
ifconfig
Which should reveal your new settings.
Installing JVM
NOOBS comes with pre-installed java. You can easily check this by calling the command:
java -version
pi@rpi2-openhab ~ $ java -version
java version "1.8.0"
Java(TM) SE Runtime Environment (build 1.8.0-b132)
Java HotSpot(TM) Client VM (build 25.0-b70, mixed mode)
Installing OpenHAB
Derived from instructables step by step guide.
Create the OH folder
sudo mkdir /opt/openhab
Move to that folder
cd /opt/openhab
Visit the OpenHAB download page and copy the runtime package web address to be used in the command below.
download the package typing:
sudo wget https://bintray.com/artifact/download/openhab/bin/distribution-1.7.1-runtime.zip
unzip the package
sudo unzip distribution-1.7.1-runtime.zip
remove the package
sudo rm distribution-1.7.1-runtime.zip
Move to the addons directory
cd addons
download the addons package
sudo wget https://bintray.com/artifact/download/openhab/bin/distribution-1.7.1-addons.zip
unzip the package
sudo unzip distribution-1.7.1-addons.zip
Remove the package
sudo rm distribution-1.7.1-addons.zip
Visit this page to get the latest version of Souliss OpenHAB binding
Copy file org.openhab.binding.souliss_1.7.0.201507152300.jar in folder /opt/openhab/addons
Configure Souliss binding
The following steps are basically following the souliss-openhab wiki.
Souliss binding basic configuration
Move to configuration folder:
cd /opt/openhab/configurations
Create a copy of the default cfg files to add your personal settings:
cp openhab_default.cfg openhab.cfg
Edit the file :
sudo nano openhab.cfg
Add the following lines a the bottom:
################################ Souliss Binding ##########################################
#
# Souliss
#
# For ITEM defination in file .item
#{souliss#<Typical>:<nodeID>:<slot>:[<bit>|<useOfSlot>]}

souliss:IP_LAN=192.168.1.100
souliss:USER_INDEX=71
souliss:NODE_INDEX=134
#SERVERPORT - Leave empty for casual port
souliss:SERVERPORT=

#time in mills - min 50
souliss:REFRESH_DBSTRUCT_TIME=600000
souliss:REFRESH_SUBSCRIPTION_TIME=120000
souliss:REFRESH_HEALTY_TIME=60000
souliss:REFRESH_MONITOR_TIME=500
souliss:SEND_DELAY=1500
souliss:SEND_MIN_DELAY=100
souliss:SECURE_SEND_TIMEOUT_TO_REQUEUE=5000
souliss:SECURE_SEND_TIMEOUT_TO_REMOVE_PACKET=30000
###########################################################################################
My complete openhab.cfg file is published here
items configuration
Move to items folder:
cd /opt/openhab/configurations/items
Create an item file:
sudo nano souliss.items
Add your souliss items using the syntax {souliss=<Typical>:<nodeID>:<slot>:[<bit>]} as detailed described in the howto guide here
My souliss.items file is published here
sitemaps configuration
Move to sitemaps folder:
cd /opt/openhab/configurations/sitemaps
Create a sitemap file:
sudo nano souliss.sitemap
Create your personal sitemap according to the OpenHAB syntax.
I have two sitemaps, the one I use is published here, the one designed for my wife is here.
using custom icons
My sitemaps uses some custom icons.
These icons shall be copied in folder /opt/openhab/webapps/images
Start OpenHAB manually
By default the “start.sh” script is not an executable file. Do the following in order to make it executable:
sudo chmod +x start.sh
sudo ./start.sh
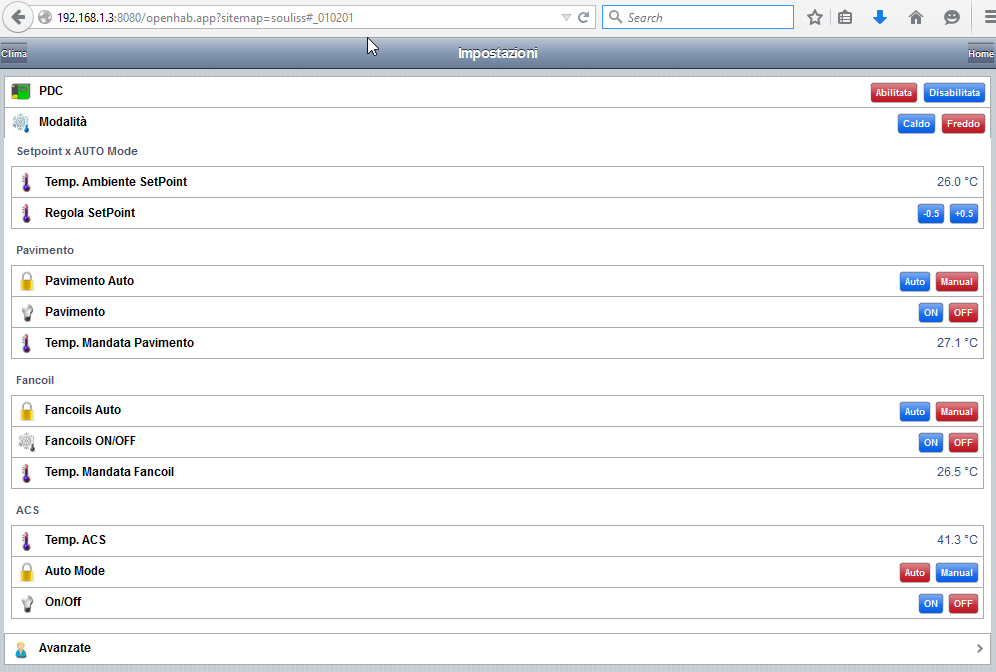
And the fun begins! You should have a fully loaded system with your items and sitemps according to your configuration. Open you favorite browser and type (of course subsitute my ip address with the one of your server):
http://192.168.1.3:8080/openhab.app?sitemap=souliss
Configuring openHAB to Start Automatically at Boot
Follow this guide.
In my first installation I encounter issues due to a wrong line end: the script was not working, a simple dos2unix command on the script solved the issue.
Installing HABmin
HABmin is a web administration console for openHAB. It aims to provide a complete interface to administer openHAB.
Get the zip web address from the habmin download page.
Move to openhab folder:
cd /opt/openhab
Download the zip:
wget https://github.com/cdjackson/HABmin/releases/download/0.1.3-snapshot/habmin.zip
Unzip the package:
unzip habmin.zip
Remove the package:
rm habmin.zip
Restart openhab:
sudo /etc/init.d/openhab restart
Open habmin by simply pointing your browser to:
http://192.168.1.3:8080/habmin/index.html
Enabling OpenHAB persistence
Check that package org.openhab.persistence.rrd4j-1.7.1.jar is present in folder openhab/addons
Create a persistence rule
Move to persistence folder:
cd /opt/openhab/configurations/persistence
Create a new persistence rule:
`sudo nano rrd4j.persist’
And create your own rule according to openhab syntax.
My persist file is published here
Restart openhab:
sudo /etc/init.d/openhab restart
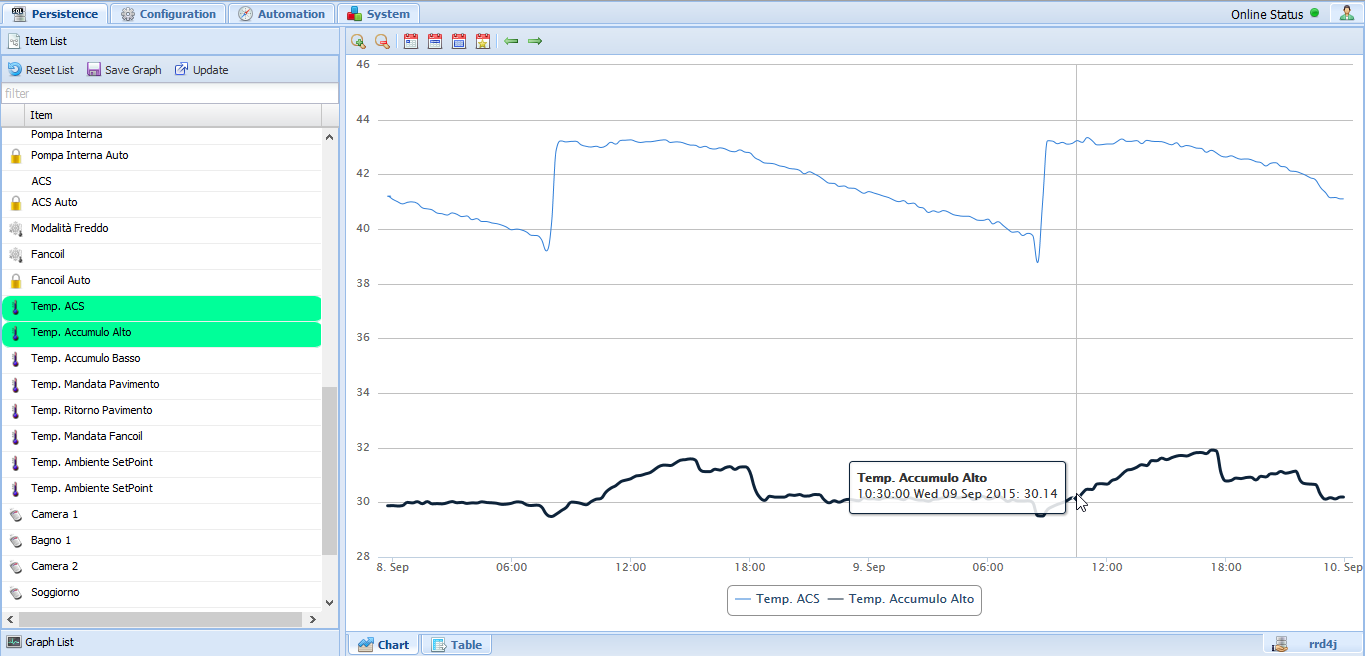
To check that persistence is working you can look in /opt/openhab/etc/rrd4j/ for fresh rrd files.
If persistence and habmin are working on your system you may play a bit with very nice graphs:
General Tips
Some general tips about Java perfomace on Raspberry Pi.
rpi-update
Stay up to date with rpi-update An easier way to update the firmware of your Raspberry Pi.
System memory
Java loves memory. I’d rather suggest you to operate this unit headless and reduce GPU memory.
Run sudo raspi-config select memory_split and decrease GPU memory to 16. You’ll get more than 100 Mb of additional system memory.
Disabling TV Service
For headless, add these to /etc/rc.local:
## Limit GPU IRQs
fbset -xres 16 -yres 16 -vyres 16 -depth 8
/opt/vc/bin/tvservice -o
Swap file
Do not swap! Manage your JVM memory consumption with -ms and -mx keys. If you absolutely have to swap move swap file (/var/swap) to USB HDD of fast flash drive because swapping to SD card is painfully slow. You can set swap size in /etc/dphys-swapfile config file.
Overclocking
Overclocking does not seem to have a significant impact on OpenHAB performances.