This tutorial shows how to load custom code on the ESP8266 based modules, like Expressif ESP-01, ESP-12 or the Olimex ESP8266-EVB, this is based on the porting of Arduino cores for the ESP8266 microcontroller.
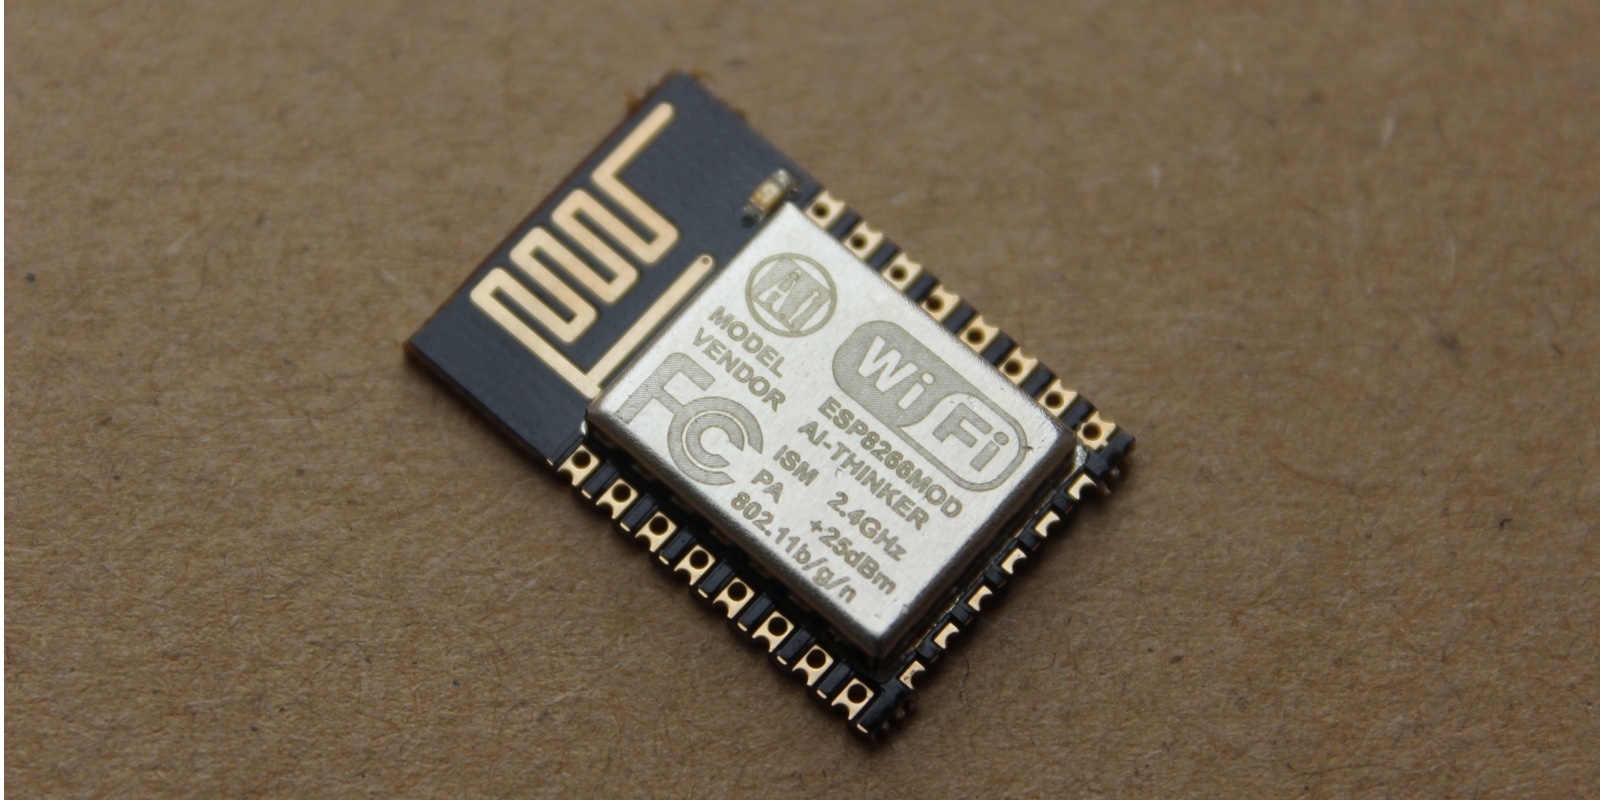
ESP-12
Even if we focus on ESP-12, but this tutorial applies for all breakout modules based on ESP8266, you just need to cross check the pin assignment on the PCB, to start you need:
- ESP-12 module
- USB to Serial Converter at 3v3 (FTDI PL2303 - CH340 and others)
Wiring
The are two main wiring schemes that you will need to use, those are referred as USART Mode and FLASH Mode. The former is used to load a new code and the latter to run that code, from this point on is assumed that the code will be loaded into the companion FLASH memory. The use of the external FLASH memory is not the only available option with the ESP8266, but all the commercial modules based on this SoC use this approach, so that the MTDO pin is always at GND.
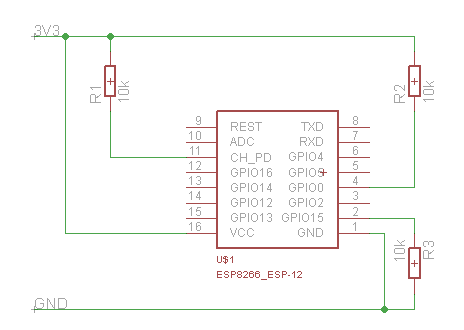
The minimal setup required to load a new sketch on your ESP8266 based module is the following one
USART Mode ESP-01 and others
| PIN | Resistor | Serial Adapter |
|---|---|---|
| VCC | VCC (3.3V) | |
| GND | GND | |
| TX or GPIO1 | RX | |
| RX or GPIO3 | TX | |
| GPIO0 | GND | |
| GPIO2 | VCC (3.3V) | |
| Reset | RTS* | |
| GPIO15 | PullDown | |
| CH_PD | PullUp |
- Note
- if no RTS is used a manual toggle is needed
Once the sketch has been loaded, you can run your module using the following setup
Operating Mode ESP-01 and others
| PIN | Resistor | Power supply |
|---|---|---|
| VCC | VCC (3.3V) | |
| GND | GND | |
| GPIO0 | PullUp | |
| GPIO15 | PullDown | |
| CH_PD | PullUp |
Minimal
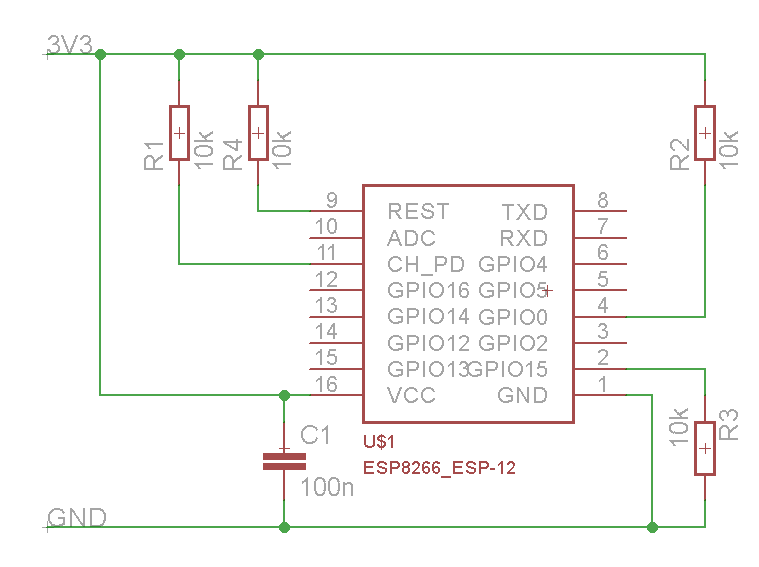
Improved Stability
Important Note
Before load the code in the module you need to start it in USART Mode, this is achieved following these steps:
- Remove power from the module
- Connect GPIO-0 to GND
- Connect GPIO-2 to VCC
- Power the module
At this point the module is in USART Mode and you can load the code from the Arduino IDE (see details below). Once completed the load of the code:
- Remove power from the module
- Connect GPIO-0 to VCC
- Connect GPIO-2 to VCC
- Power the module
The module will start using the code loaded in the external FLASH memory, once the boot has been completed the GPIO-0 and GPIO-2 can be used as standard I/O pins.
Olimex ESP8266-EVB
The Olimex ESP8266-EVB is an evaluation board for quick prototyping with ESP8266, it doesn’t require you any soldering action.

In order to start with this module you need
- A regular 5V / 500 mA power supply with classic DC jack
- USB to Serial Converter at 3v3 (FTDI PL2303 - CH340 and others)
You need to connect your USB to Serial converter according to the following table on the UEXT connector, the pinout that follow refers to a male connector

| ESP8266-EVB | Serial Adapter | |
|---|---|---|
| GND | GND | |
| TX | RX | |
| RX | TX |
Is convenient to power the board from an external power-supply, because you need to remove power every time that you need to load a new code on the ESP8266 and because the USB to Serial converter is generally not able to provide enough power to on-board relay.
Before load the code in the module you need to start it in Bootloader Mode, this is achieved following these steps:
- Remove power from the module
- Press (keep pressed) the button on the board
- Power the module and release the button after a couple of seconds
At this point the module is in Bootloader Mode and you can load the code from the Arduino IDE (see details below). Once completed the load of the code you just need to power-cycle the module to get your code executed.
Arduino IDE
The Arduino IDE allow an easy add-on of cores that has been developed by the community, this allow you reuse Arduino-like codes and libraries on non official boards. Perform the following steps to add the ESP8266 cores:
- Install the latest Souliss’ supported Arduino IDE and have a general read of the Getting Started guide
- Create a folder called portable inside the IDE main folder
- Start Arduino and open Preferences window.
- Refer to the latest supported core for Souliss in the wiki
- Follow the installation instruction ESP8266 cores for Arduino, the cores are distributed via the Arduino IDE Board Manager and needs an URL for the distribution of the code. You can check the supported core here
- As today, the URL to be used is http://arduino.esp8266.com/stable/package_esp8266com_index.json into Additional Board Manager URLs field. You can add multiple URLs, separating them with commas.
- Open Boards Manager from Tools > Board menu and install ESP8266 platform (you will need to select your ESP8266 board from Tools > Board menu after installation).
- Install Souliss library on Library Manager of Arduino IDE
At this point follow the procedure that has been reported previously to set the ESP8266 in Bootloader Mode and load the code from the Arduino IDE. Souliss include several examples, some are listed below:
- Gateway code for generic ESP8266 e01_Hello_ESP8266
- Peer code for generic ESP8266 e01_Peer_ESP8266
- Gateway code for Olimex ESP8266-EVB e04_Olimex_ESP8266-EVB
The ESP8266 cores for Arduino are maintained by the ESP8266 Community.