
Working with the ESP8266 is always a great experience, it becomes just a matter of getting the proper I/O and then in few minutes your module is running. The introduction of the ESP8266 in the supported SoC for Souliss has open the world of smart devices to the DIYers and the very competitive price of this IC will spread it into consumer products.
In the last few days we have started working with Authometion to support the new LYT8266, a variant of their RGBW LED Bulb that has an ESP8266 inside, so that you should program your sketches directly into the lamp (this is in contrast with the approach used with LYT88).
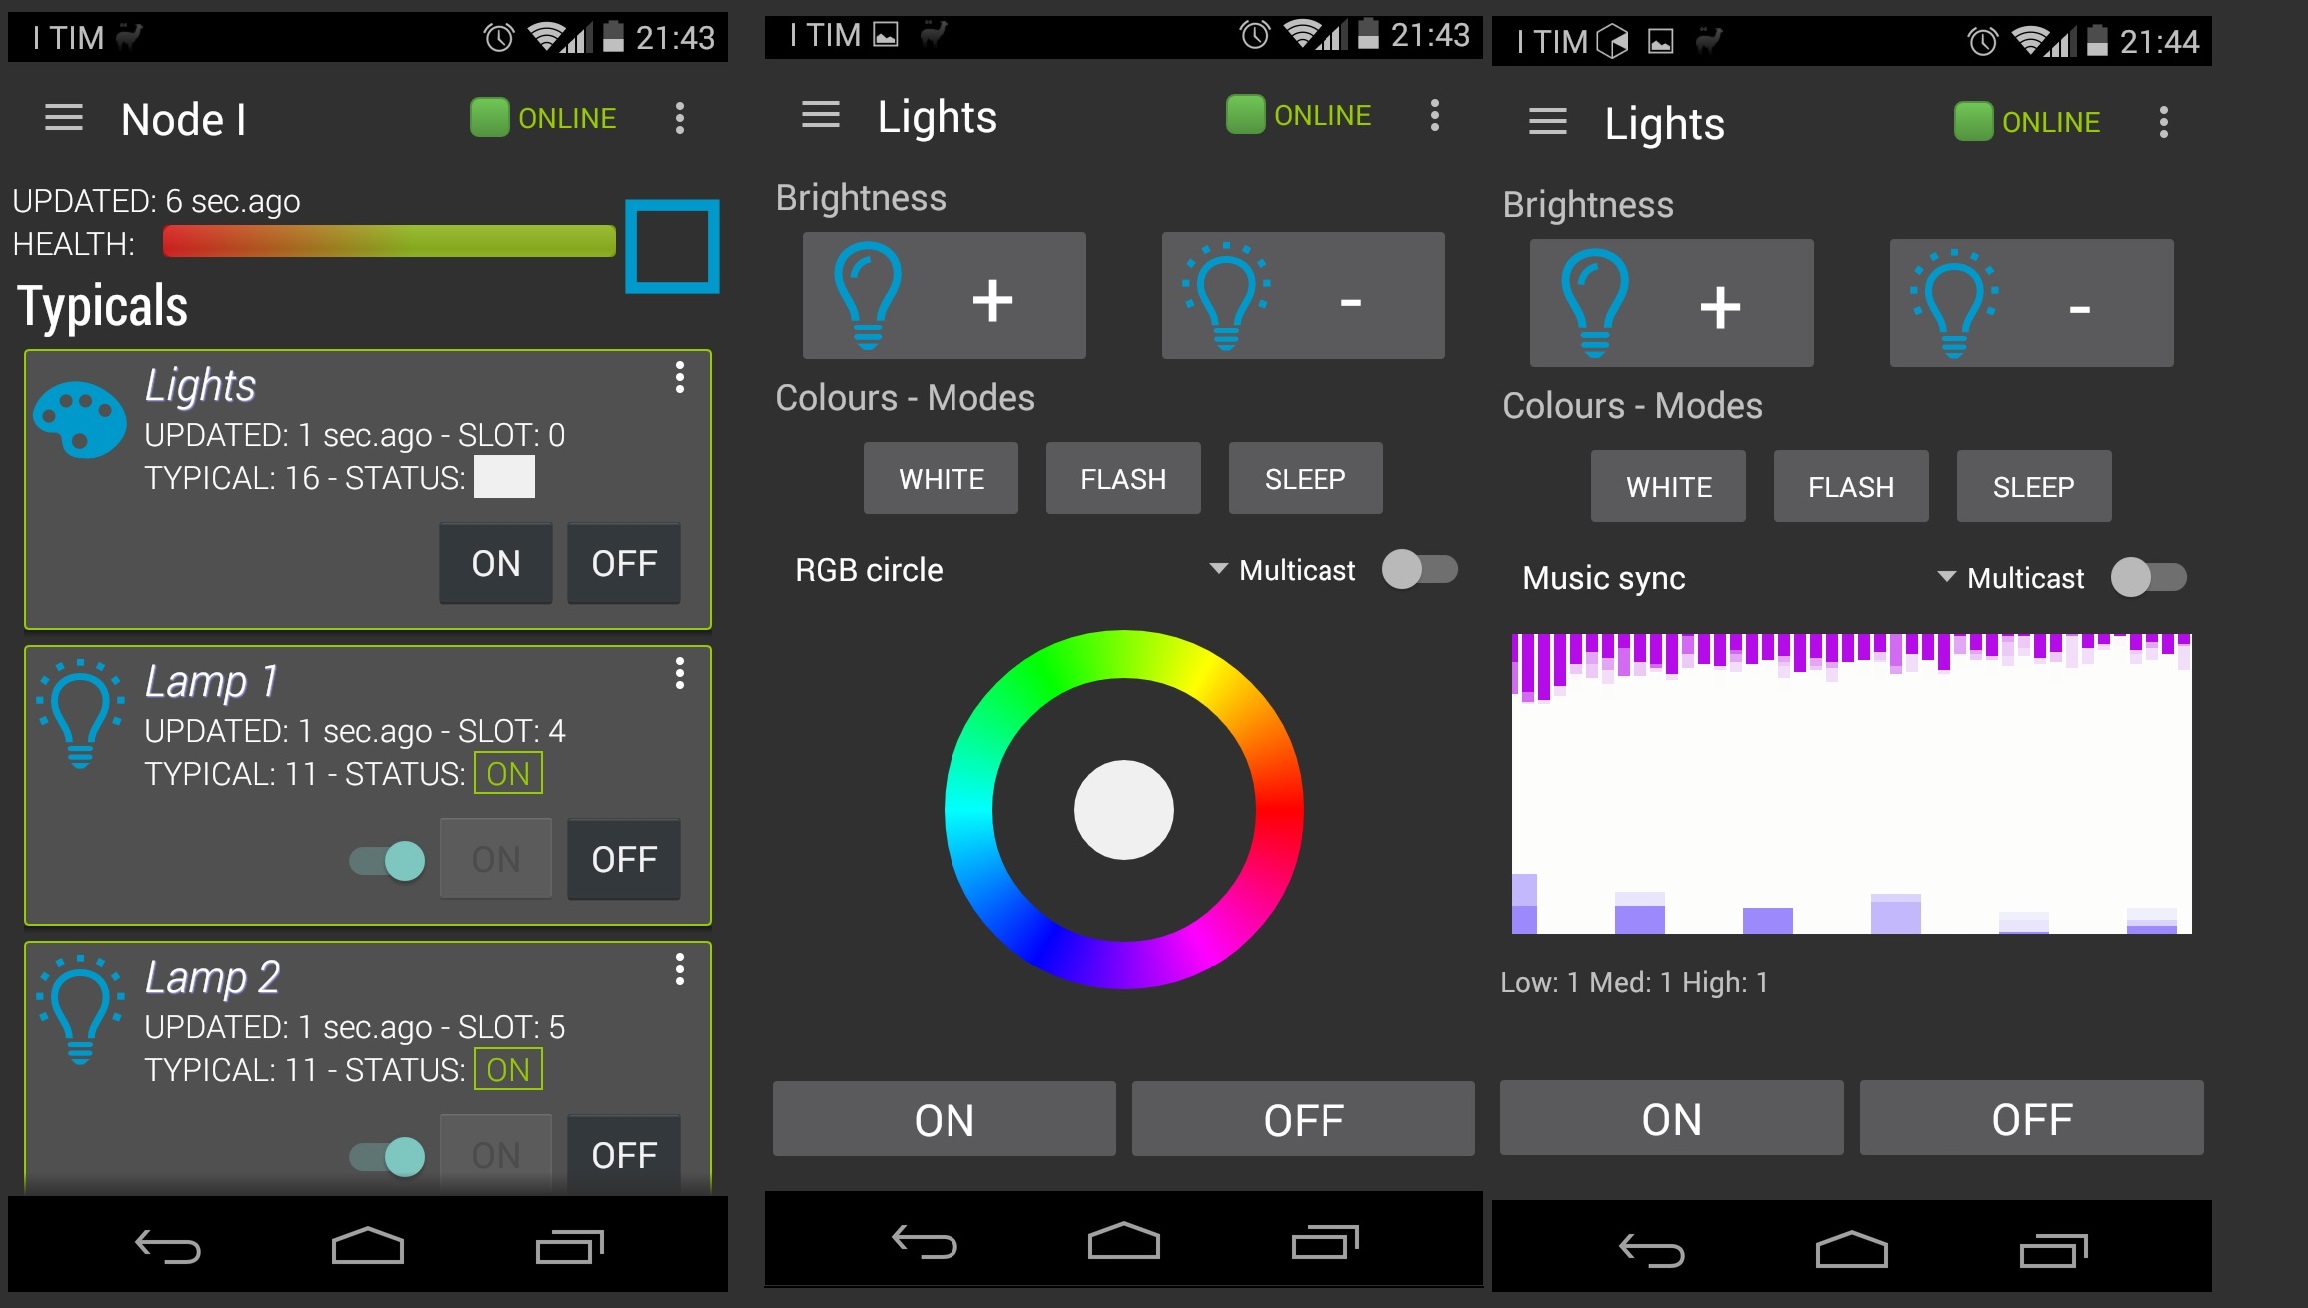
Thanks to the Arduino cores for ESP8266 you can program this bulb directly from the Arduino IDE using OTA (Over the Air) programming, running Souliss you have direct access via SoulissApp or openHAB.

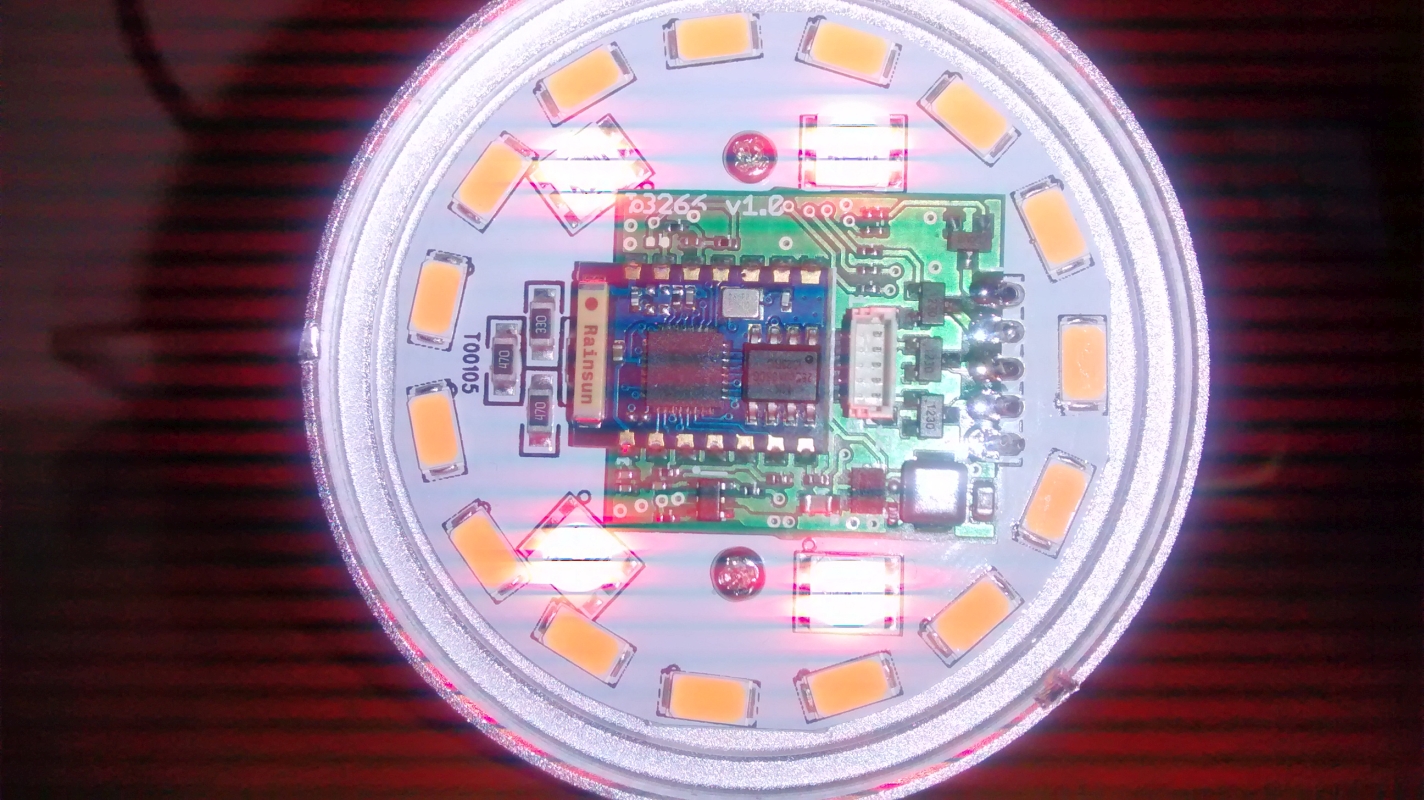
A side-to-side comparison show a LYT88 bulb (on the left side) with a LYT8266 (right one), the voltage regulation is based on a switching circuit (on top right, you can see the inductor and regulator) this is due to the high current required by the ESP8266 compared to a standard microcontroller with external RF radio (as on the left side). The I/O is basically the same, with one mosfet for each channel used to sink the current from the LEDs powered at near 12 Vdc.
LOAD YOUR SKETCH OverTheAir (OTA)
Loading a new sketch has two option, using the cable or the air. The Over the Air programming is very simple and can be used right out-of-the-box if your bulb has Souliss pre-loaded.
You need the following pre-requisites to load a sketch:
- Install the Arduino IDE 1.6.5 (this is the supported release at time of writing)
- Install Python 2.7 and have it in your Windows path
- Install the ESP8266 cores for Arduino, the cores are distributed via the Arduino IDE Board Manager and needs an URL for the distribution of the code. You can check the supported core here
- As today, the URL to be used is http://arduino.esp8266.com/staging/package_esp8266com_index.json into Additional Board Manager URLs field. You can add multiple URLs, separating them with commas.
- Install Souliss library on Library Manager of Arduino IDE
Once you will power your bulb, if is the first time and has never been configured before, you will see an Access Point called Souliss, just connect and point your browser to http://192.168.4.1
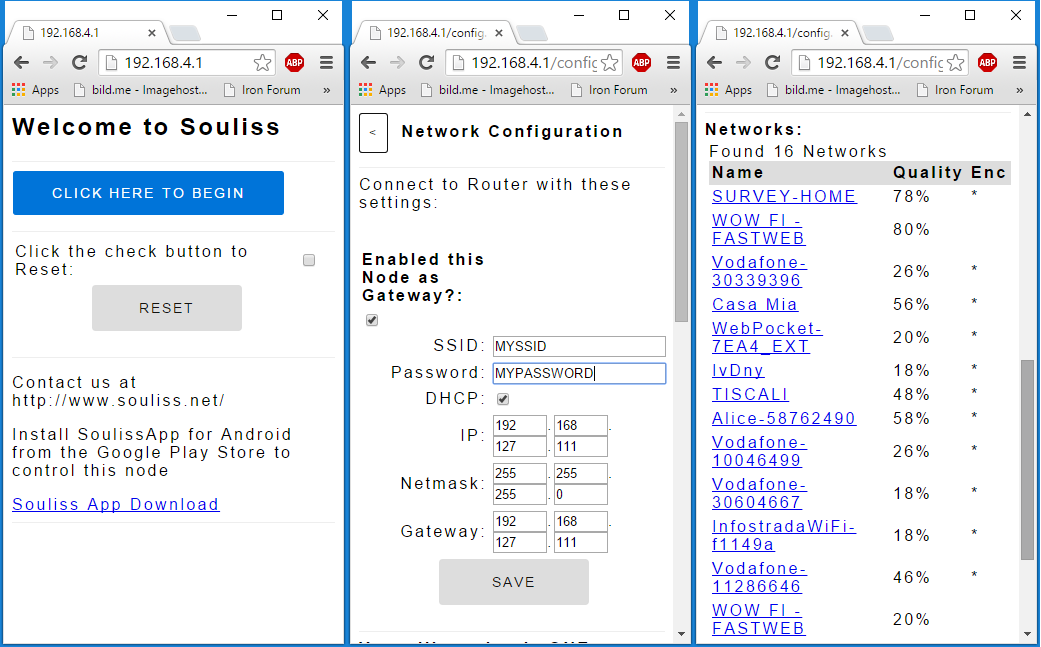
You get a web interface from where you can configure the WiFi and IP parameters, and select the node as Gateway or Peer. Configure one bulb as Gateway and the others as Peer, they will build automatically a Souliss network and will be available in SoulissApp. Note: if the DHCP box is ticked it will over-ride a manually entered address if present - and likewise for the Gateway address - so don’t tick those boxes if you wish to manually specify the addresses.
Your bulbs have full features, but if you want to upload a new sketch you just need to go in the Arduino IDE and set the following parameters:
- Board as Generic ESP8266 Module
- Flash Mode QIO
- Flash Frequency 40 MHz
- Upload Using OTA
- CPU Frequency 80 MHz
- Flash Size 1M (64K SPIFFS)
- Upload Speed 115200
In the Port sub-menu you will see the bulb and its OTA IP address which allows you to upload a new sketch over wifi as if it was connected via cable (assuming your Arduino IDE computer has wifi access to the ESP device of course).
It is very important that you always upload an OTA enabled sketch each time, otherwise you will not see the OTA device available in the Port sub-menu for uploading to over the air, and therefore you will need to connect and upload via the cable. Start from the e02_LYT8266_WiFi_Bulb.ino to build your own sketch.
LOAD YOUR SKETCH VIA USART CABLE
Using the cable to connect via USART can be useful if you don’t want OTA or if you have bricked your OTA sketch, also you can use the whole flash size (1 MByte) whereas on OTA you are only able to use 512 KBytes. All the previous pre-requisite applies also for this case.
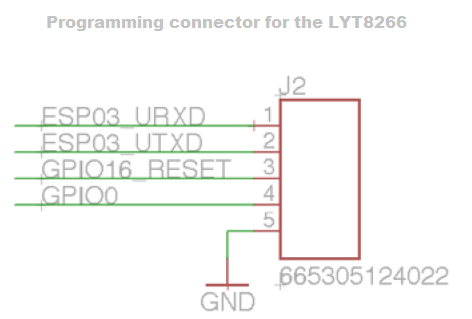
| PIN | Resistor | Serial Adapter |
|---|---|---|
| ESP03_URXD | TX | |
| ESP03_UTXD | RX | |
| GPIO16_RESET | RTS* | |
| GPIO0 | DTR* | |
| GND | GND |
The two connection with * are not mandatory, without you need to turn OFF the bulb and place GPIO0 to GND every time that you want to program it, this is similar to any other ESP8266 based device, this tutorial gives the basic to use the Arduino IDE and the ESP8266 cores.
On board of the LYT8266 the programming connector, is very small and need an adaptor supplied with the dev kit, and expose the TX, RX together with GND and GPIO0 and others. You haven’t the Vcc, so you should power the ESP8266 board connecting it to main 220 Vac (or 110 Vac), so be careful.
On the module there is an ESP-03, so on the Arduino IDE select the COM module as per your operating system and the following settings:
- Board as Generic ESP8266 Module
- Flash Mode QIO
- Flash Frequency 40 MHz
- Upload Using Serial
- CPU Frequency 80 MHz
- Flash Size 1M (64K SPIFFS)
- Upload Speed 115200
As first step, you need to load the e02_LYT8266_WiFi_Erase sketch, this will clear the FLASH sector used as EEPROM from random data and later load the e02_LYT8266_WiFi_Bulb this will start the bulb as access point with a web configuration interface restoring the factory firmware.
/**************************************************************************
   Souliss - LYT8266 WiFi RGBW LED Bulb

    This is the basic sketch for an LYT8266 a WiFi LED Bulb based on ESP8266,
    at first boot it starts as access point with a basic web interface to
    allow WiFi and Souliss configuration.
    Info are stored in the module and used at next boot.

    Configure one module as Gateway for your network and all the other as
    Peer. Before load this sketch, run the e02_LYT8266_WiFi_Erase to erase
    the memory.
    Once configured, can be accessed via SoulissApp or openHAB.

***************************************************************************/

#include <ESP8266WiFi.h>
#include <ESP8266WebServer.h>
#include <ESP8266mDNS.h>
#include <EEPROM.h>
#include <WiFiUdp.h>

// Configure the Souliss framework
#include "bconf/LYT8266_LEDBulb.h"          // Load the code directly on the ESP8266
#include "conf/RuntimeGateway.h"            // This node is a Peer and can became a Gateway at runtime
#include "conf/DynamicAddressing.h"         // Use dynamically assigned addresses
#include "conf/WEBCONFinterface.h"          // Enable the WebConfig interface

#include "Souliss.h"

// Define logic slots, multicolor lights use four slots
#define LYTLIGHT1           0

#define RED_STARTUP         0x50
#define GREEN_STARTUP       0x10
#define BLUE_STARTUP        0x00

// Setup the libraries for Over The Air Update
OTA_Setup();

void setup()
{
    // Init the network stack and the bulb, turn on with a warm amber
    Initialize();
    InitLYT();

    /****
        Generally set a PWM output before the connection will lead the
        ESP8266 to reboot for a conflict on the FLASH write access.
        Here we do the configuration during the WebConfig and so we don't
        need to write anything in the FLASH, and the module can connect
        to the last used network.
    ****/
    SetColor(LYTLIGHT1, RED_STARTUP, GREEN_STARTUP, BLUE_STARTUP);

    // Read the IP configuration from the EEPROM, if not available start
    // the node as access point.
    //
    // If you want to force the device in WebConfiguration mode, power OFF
    // your router and power OFF and then ON the bulb, you will see an access
    // point called Souliss.
    if(!ReadIPConfiguration())
    {
        // Pulse a bit
        LYTPulse();

        // Start the node as access point with a configuration WebServer
        SetAccessPoint();
        startWebServer();

        // We have nothing more than the WebServer for the configuration
        // to run, once configured the node will quit this.
        while(1)
        {
            yield();
            runWebServer();
        }

    }

    if (IsRuntimeGateway())
    {
        // Connect to the WiFi network and get an address from DHCP
        SetAsGateway(myvNet_dhcp);       // Set this node as gateway for SoulissApp
        SetAddressingServer();
    }
    else
    {
        // This board request an address to the gateway at runtime, no need
        // to configure any parameter here.
        SetDynamicAddressing();
        GetAddress();
    }

    // Define a logic to handle the bulb
    SetLYTLamps(LYTLIGHT1);

    // Init the OTA
    OTA_Init();
}

void loop()
{
    EXECUTEFAST() {
        UPDATEFAST();

        // Is an unusual approach, but to get fast response to color change we run the LYT logic and
        // basic communication processing at maximum speed.
        LogicLYTLamps(LYTLIGHT1);
        ProcessCommunication();

        // Run communication as Gateway or Peer
        if (IsRuntimeGateway())
            FAST_GatewayComms();
        else
            FAST_PeerComms();
    }

    EXECUTESLOW() {
        UPDATESLOW();

        // Slowly shut down the lamp
        SLOW_10s() {
            LYTSleepTimer(LYTLIGHT1);
        }

        // If running as Peer
        if (!IsRuntimeGateway())
            SLOW_PeerJoin();
    }

    // Look for a new sketch to update over the air
    OTA_Process();
}
The LYT8266 in our hands are actually prototypes that will be unvelived at Maker Faire Rome 2015 at the Authometion booth, there will be also a workshop to have your hands on these devices. The sales will start after the faire, so a month or so before having them available on the market.
UPDATE
The LYT8266 is now on the Authometion store, have a look here is also available as pre-assembled device
Enjoy!